
|
Fred Henstridge Photography |
|
Creativity through the Pursuit of Excellence. Delivering Quality Products and Services at Competitive Prices. |
|
With the Christmas season upon us it’s time to offer a few tips for your holiday picture taking. We all like to take those photos of the kids opening their packages and our festive parties. These should be treasured memories throughout the years. With many people owning digital cameras or receiving such a camera as a Christmas gift I want to share a few tips with your so that you will not be disappointed with the results and you will have more fun taking your holiday photos. |
|
Holiday Picture Taking Tips |
|
Vol.1, No. 5, Dec. 4, 2008 |
|
Storage and Archiving |


|
Control Click on any photo or image for a larger view or link to more information. |

|
Let’s start with storage and archiving. One of the great advantages of digital cameras is that we can take a great number of pictures and a very low price. The question is, “what do I do with all of these digital images?” Well, since we can’t fill a shoebox with a bunch of digital images and leaving them on you camera’s memory card is really very dangerous, how do you find those images ten or twenty years from now when you want to make a video slide show of you children or grandchildren before they are married or graduate from college? As soon as you have taken your photos and put you camera away until the next holiday, special occasion or vacation upload the images from your memory card to you PC and then burn a CD or DVD of the images, label the CD or DVD and store it in your shoebox. Label the CD or DVD with dates of the photos, event and other items that will help you identify the images ten years from now. Once you have uploaded you images to your PC and burned your backup copies you should reformat your memory card. Deleting the images from the card is not the same as formatting. When you delete a digital file you leave the metadata (data about the image) on the card. This reduces the capacity of the card. Formatting cleans the card and maintains its integrity and capacity. It will also guard against card errors. Refer to your camera’s user manual on how to format your memory card. Another point to remember is that uploading directly from you camera via its USB port is possible I do not recommend it. I always use one of those little USB card readers; they are very inexpensive and easy to use with Windows XP, Vista or a Mac. This also prevents possible damage to the camera if something goes wrong during the upload process. Do not ever format the memory card with the PC. Always use the camera as instructed by the manual. |
|
Red Eye |
|
Ugh! The one thing that ruins a family photo more than anything else is that dreaded “Red Eye”. Humans, unlike most animals, don't have a tapetum lucidum layer in their retinas. If you shine a flashlight in a person's eyes at night, you don't see any sort of reflection. The flash on a camera is bright enough, however, to cause a reflection off of the retina -- what you see is the red color from the blood vessels nourishing the eye. Many cameras have a "red eye reduction" feature. In these cameras, the flash goes off twice -- once right before the picture is taken, and then again to actually take the picture. The first flash causes people's pupils to contract, reducing "red eye" significantly. Another trick is to turn on all the lights in the room, which also contracts the pupil. The problem with this is that this double flash takes time and ruins the spontaneity of the photo and generally annoys people. Another way to reduce or eliminate "red eye" in pictures is to move the flash away from the lens. On most small cameras, the flash is only an inch or two away from the lens, so the reflection comes right back into the lens and shows up on the image. If you can detach the flash and hold it several feet away from the lens, that helps a lot. The preferred method, if you have a removable flash, is to bounce the flash off the ceiling. If you do not have a removable flash try putting a layer of white cloth over the flash. This will act as a diffuser and reduce the harsh, spectral light of the flash. Make sure it is a white cloth and not colored, as the color will influence the color of the light from the flash, which is usually balance for daylight at 5500K If you have a digital SLR with a “pop up” flash you can use the white cloth method or purchase an inexpensive diffuser for you flash from B&H. It will make a great difference in the quality of your photo and you will not have to use a photo editing procedure to remove the red eye, which on low resolution images does not work well. |
|
Batteries |
|
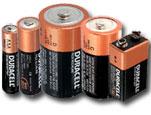
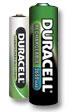
Today’s digital cameras come with two types of power supplies, off-the-shelf AA and camera specific batteries. If your camera uses a camera specific battery I strongly recommend that you purchase a second battery and rotate their usage. Also, these camera specific batteries like to be charged. As they are Lithium-Ion batteries that do not have to be run down or exhausted prior to recharging. Check your camera’s user manual and invest in a second battery. You will never regret it. It’s not much fun to see that low battery warning in the middle of your child’s special event or the holiday party. B&H carries a complete line of digital camera batteries. AA Batteries. The first thing you have to do is to discard those discount store AA batteries. They may be inexpensive, but they do not last very long and their voltage levels are not stable. Use only quality batteries such as, Duracell or Energizer. Better yet, invest in Energizer Lithium Batteries. They are more expensive than the alkaline cells, but last 8 times longer and maintain a stable voltage level when not in use. Rechargeable energy cells work fine, but you need a charger and they deplete on the shelf. Whatever type of battery you use carry fresh spares with you. Do not buy rechargeable batteries rated at less than 2400 mAh, they do not have enough power for digital cameras or flash units. |
|
Night Shots |
|
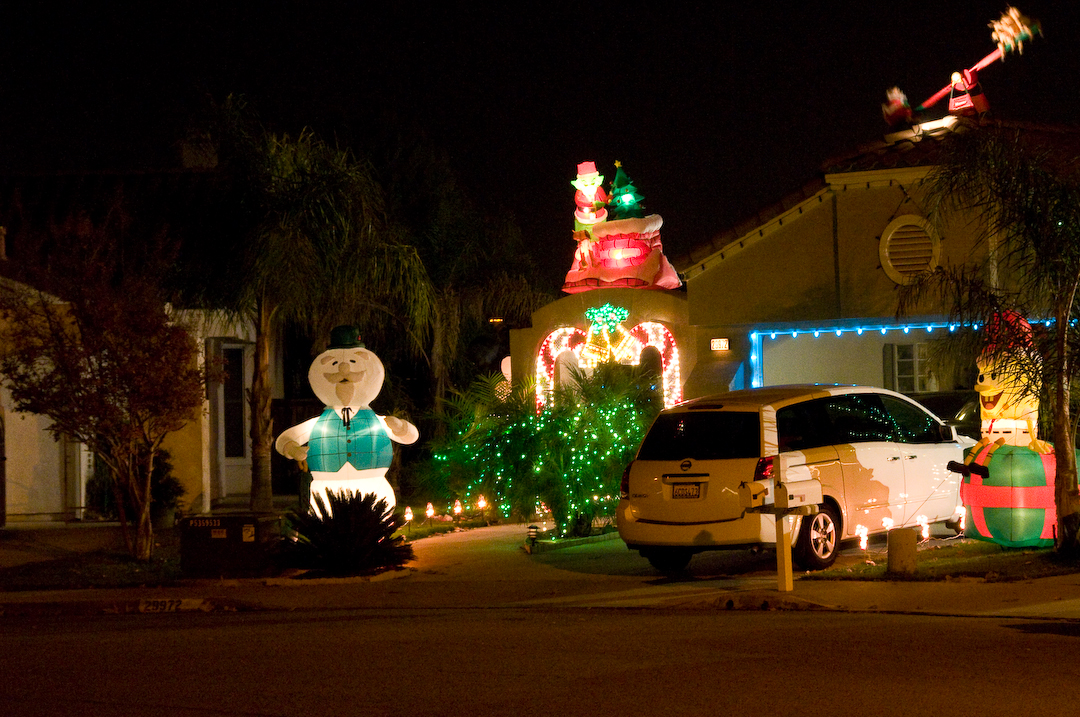
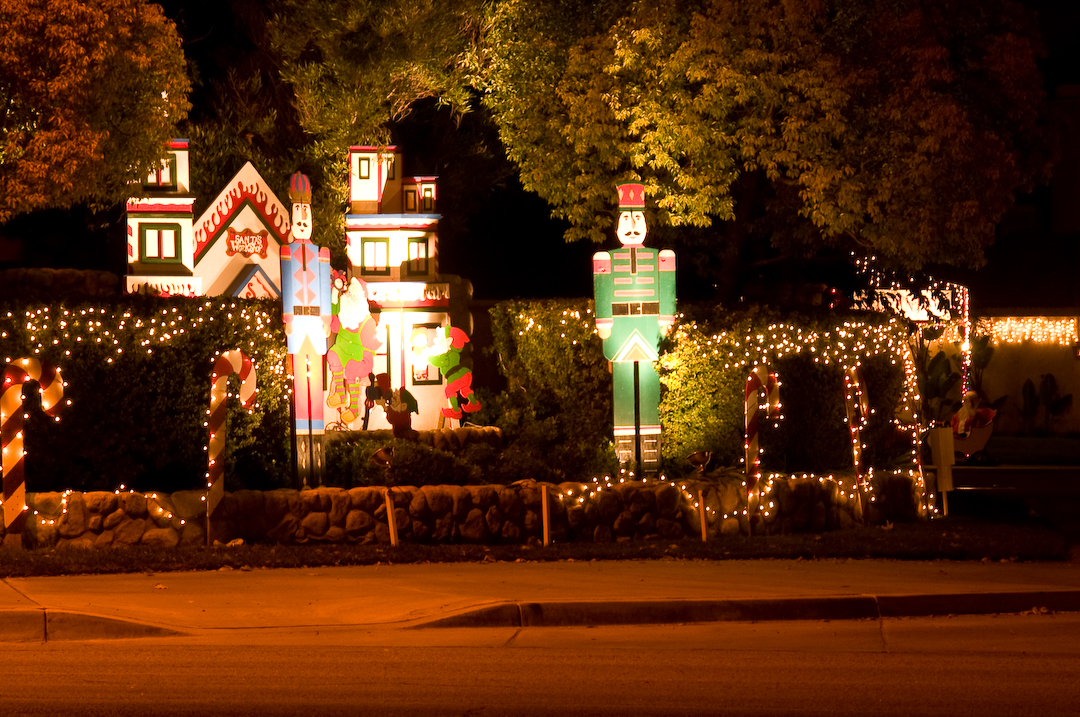
How about taking pictures of those over-decorated houses where the owners have stock in the local electoral company or some nice natural light photos of the interior of your own home all decked out for Christmas. Digital cameras will do a nice job of capturing these images, especially when the ISO is set to auto. There are two problems with this method. One is blurring caused by camera movement when the shutter speed is less than 1/40 of a second and the second is caused by something called noise (grain and color artifacts in the image) when higher ISOs are used. The quality of the image from all compact and some low end digital single lens reflex (DSLR) cameras really degrades at ISO sped above 400. In compact cameras this is due to the very small size of the sensor. In low end DSLRs it’s due to the lack of enough internal software and sensor design. With higher end DSLRs, such as Nikon D300 or D3, you can push the ISO to 800 without noticeable noise. Since most compact digital cameras have lenses with a maximum aperture of 5.8-6.3 it’s almost impossible to get a nice night or natural room light image at an ISO of 400 or lower without a camera support. There are many ways to support your compact digital cameras ranging from miniature table-top tripods to a small beanbag. The main thing to remember is to use the self timer when taking the picture. This will eliminate any camera vibration caused when you press the shutter release button. The best way to do it to set you ISO to 200 or 400, set up your shot on the stable platform, select the self timer and press the button. For larger, heavier DSLRs the process is the same, except you will need a good, full sized tripod. Carbon fiber tripods are both strong and lightweight. They cost more than the traditional steel leg tripods, but are worth every penny. |
|
Color Balance |
|
The term color or white balance is a term carried over from the days of film and the early days of video. In the past days of shooting with transparency (slide) film there were two types of film, Daylight and Tungsten. These films were balanced to record images where the light was either daylight (5500k) or tungsten (3400k or 3200K). The photographer would load his camera with the type of film to match the lighting conditions and hope that the results would be acceptable. The photographer would have to use light balancing filters to correct the light to the color temperature of the film. He would even buy and expensive color meter to measure the temperature of the light so he could use one of his many light balancing filters. What a mess! When shooting with negative stock, like Kodacolor, this was not always necessary as the color correction could be performed in the printing process – still a pain. The early days of shooting video brought about the introduction of an electronic means of setting the white balance by aiming the lens at a white card and pressing a button on the camera. The sensor in the camera knowing that this image was supposed to be pure white would correct the red, blue and green (RGB) settings for the sensors and the recorded image would look like it should. Today’s digital cameras all use a similar color balancing method. They come with settings for daylight, tungsten, flash, cloudy, shade, fluorescent and the all encompassing auto. They are pretty smart and the auto setting works well most of the time. If you want to increase the quality of your images you should set the camera’s color balance for the type of lighting conditions you are shooting in. There is only one problem with this preferred method. You must remember to set it back to auto or change to the new lighting condition. Unless you are comfortable doing this color balance thing a lot I recommend you leave it on auto. While the color in your photos may not be nearly perfect, they will be acceptable. For you high end DSLR shooters I recommend using the preset method for white balance, especially in mixed lighting. Refer to you camera manual for the procedure to do this. It really works well. |
|
Resolution |
|
This is a tricky subject. Today most compact digital camera come with sensors that will capture from 5 to 13 megapixel images. A 5 megapixel sensor will yield an image that contains 5,000,000 pixels of digital information at its full setting. This is really great for obtaining quality prints up to 8x10. 13 megapixel sensors will yield 13,000,000 pixels allowing for a quality 16x20 print. Cool, you say. Well it’s not so cool if you set your image quality to small. This will allow for an increase in the images you can store on your memory card and reduce the file size, but it will greatly reduce the quality of the image you will have. You can always downsize and image in the editing process with editing software such as Photoshop, but you can never bring back lost pixels. As an example my Nikon D300 will record images at 4288x2848 (12.2MP), 3216x2136 (6.9MP) and 2144x1424 (3.1MP) megapixels. If I record my images at 2144x1424 I have just turned my expensive Nikon D300 into a ten-year old 3.1 MP camera. Not so cool! This is not something you will appreciate ten years from now when you want images of little Johnny or Jane and all you have is a crummy 3MP image. This may be okay for e-mail or Web posting, but not good for archiving or printing. The solution – get a larger memory card and download your and back up your photos after every photo session. Cards are not expensive. A note on JPG compression. Unless you shoot in camera raw, which compact digital cameras cannot do, you will record your images as JPG files. Always set your JPG recording for high quality, not small file size. Remember, every time you open a JPG image for viewing or printing you lose data in the file and degrade the image. It’s best to start with a high quality JPG compression, immediately back up you files and work with copies of your digital images. |
|
Rear Sync Flash |
|
Rear Sync Flash is a means of setting your camera’s flash to file after an exposure has been made based on the ambient light. It’s a nice way to take a photo of someone in front of you lighted Christmas tree. The camera will record the image in with the ambient light from the room and the tee and then file the flash to light up the person in front of the tree. You will need a camera support as the shutter will stay open for as long as it takes to record the ambient light. Don’t for get to use a lower ISO 200-400 and use the self times to release the shutter. Give it a try; the results can be very pleasing. |
|
Editing of Photos |
|
The last item I want to address is that of editing photos. There are many editing applications on the market from very simple and basic to full bodied and complex. If your budget can stand it I recommend Adobe Photoshop Elements 7.0. It will handle most, if not all, of you photo editing needs and comes with an organizer for cataloging and tagging your images. It has three editing modes; Quick Fix, Guided Edit and Full Edit. Guided edit is a great way to begin using the program and it will fix most of your digital images problems. It also has a share module that gives you the ability to quickly e-mail photos and create slide shows that you can share with friend and family.
I wish you all the best in your holiday photo taking and hope you capture many memorable family moments. May you have a Merry Christmas and a Happy and Prosperous New Year. |


|
One of the better products on the market for backing up your photos and video is Easy Media Creator by Roxio. EMC gives you ability to burn and label backup CDs or DVDs in just a few minutes. The full Creator suite also includes photo and video organizing and editing, slideshow production, music editing and many more neat features. If you want to share your slideshows and photo galleries on line take a look at their PhotoShow product. |
|
Burning Backups Made Easy |


|
Adobe Elements 7.0 is a great way to organize, edit, print and share your photos. Click Here for an overview of PSE 7.0 and view some of the videos that demonstrate the product. You will need a Quick Time Player plug-in for your browser. To download the free Quick Time Movie Player Click Here. |
|
Adobe Photoshop Elements 7.0 |


|
Night photo taken at 0.7 seconds @ f9.5 with the ISO set to 3200. White Balance was set to Tungsten at 2850K. Note the extreme “Noise” in dark areas of the image. Ctrl-Click on images for a larger view |
|
Night photo taken at 3.0 seconds @ f9.5 with the ISO set to 400. White Balance was set to Tungsten at 2850K. Note the lack of “Noise” in the dark areas of the image. Ctrl-Click on images for a larger view |


|
Photo Taken with White Balance set to Daylight (5500K). Good white balance under blue sky ambient light. |
|
Same Photo Taken with White Balance set to Tungsten (2850K). Note extreme blue cast to image. |
|
Photo Taken with White Balance set to Tungsten (2850K). Good white balance under mixed tungsten lighting. |
|
Same Photo Taken with White Balance set to Daylight (5500K). Note the extreme red cast to the image. |
|
You can find some light weight, inexpensive tripods for compact digital cameras at tour local Target or Best Buy store. For a heavier DSLR I recommend a good, sturdy carbon fiber tripod. Check B&H. |
|
Tripods |